Debugging, an issue that all developers should live with.
There are several strategies we can use to manage debugging, from stopping execution after dump / print the content of the variable we want to inspect (I still with this more often that I’d like to admit) to more sophisticated tools or web-server modules.
Okay, it does not enough complicated so, now let’s add DevOps. Yeah, if you want to use a tool like xdebug (here is a great tutorial about how to install it Remote PHP Debugging with Xdebug) within Docker containers.
Some questions came to my mind when I stumbled upon this situation: How do I setup the container? How can I expose xdebug outside of my containers? How can I integrate remote debugging with my IDE workflow?
Well, I don’t have the answer for all this questions, but I will show some examples and tips various ways to setup xdebug inside your docker container and connect it with PHPStorm.
Creating Docker container
This step is pretty much the same for all alternatives and OS platforms. Here we will discuss the very basic settings to create a container.
My example will be based on a clean Erdiko project, so I already have the structure to test, umm debug, some code. To try out the container clone from github, https://github.com/arroyolabs-blog/docker-xdebug
So let’s start creating a custom Dockerfile that will look like this:
FROM php:5.6-fpm
MAINTAINER Leo Daidone <[email protected]>

RUN apt-get update && apt-get install -y \
    libpq-dev \
    libmemcached-dev \
    curl

# Xdebug
# here is the installation
RUN pecl install xdebug \
    && docker-php-ext-enable xdebug
# here I'm copying the config file we will discuss in the next section
COPY ./etc/xdebug.ini /usr/local/etc/php/conf.d/

RUN usermod -u 1000 www-data

CMD ["php-fpm"]
We need to create this file instead of use the official php:5.6-fpm image, because we need to run the pecl install command within the created container. Note that I also copied “xdebug.ini” from etc folder, both, folder and file should exists in the same directory as Dockerfile, otherwise you will need to change the source path to the real location of your custom “xdebug.ini”. I choose this way because I think is easier to maintain an .ini file instead of a bunch of bash command.
Now we will need a docker-compose.yml to orchestrate the whole setup. Let’s break down the example below:
version: '2'
services:
  data:
    image: busybox
    volumes:
      - ../:/var/www/code
      - ./nginx/:/etc/nginx/conf.d

  web:
    image: nginx
    volumes_from: [data]
    links:
      - fpm
    ports:
      - "8088:80"

  fpm:
    build:
      context: .
      dockerfile: Dockerfile-PHP
    volumes_from: [data]
    environment:
      PHP_IDE_CONFIG: "serverName=docker"
I’ve defined three services, data, a busybox with the only purpose of mount and map volumes that will be shared by the other services. One web service that is an official Docker nginx image, the web server I will use in this example, finally, fpm, that will be based on our previous Dockerfile and where we will discuss variations in the next section.
Note that I’m not exposing the 9000 port (the default xdebug port) in any of Docker settings. This is the first trick for Linux, do not expose the port, just use it. That way when you try to use you IDE, you will not see an error like
Can't start listening for connections from 'xdebug': Port 9000 is busy.
Setting up xdebug
xdebug.default_enable=1
xdebug.remote_enable=1
xdebug.remote_handler=dbgp
; port 9000 is used by php-fpm
xdebug.remote_port=9000
xdebug.remote_autostart=1
; no need for remote host
xdebug.remote_connect_back=1
xdebug.idekey="PHPSTORM"
This is the basic configuration I use with the Docker code defined in the previous section. It should work fine on Linux boxes, but I found some issues trying to run it in Mac OS. I will show you some changes I tried that worked on both OS.
First issue I found when I tried to make my project works on Mac was the ports’ binding and interfaces. How can I overcome the port busy error?
After some tries I found a nice trick, I recommend, add an alias to our interface with static IP.
In Mac:
sudo ifconfig en0 alias 10.254.254.254 255.255.255.0
In Linux:
sudo ip addr add 10.254.254.254/24 brd + dev eth0 label eth0:1
Now in order to use this new static IP, we need to add this two new lines in our xdebug.ini:
xdebug.profiler_enable=0
xdebug.remote_host=10.254.254.254
I suggest set to zero all other lines except for “remote_enable” and of course “remote_port“.
Finally, our docker-compose.yml shold looks like this:
version: '2'
services:
  data:
    image: busybox
    volumes:
      - ../:/var/www/code
      - ./nginx/:/etc/nginx/conf.d

  web:
    image: nginx
    volumes_from: [data]
    links:
      - fpm
    expose:
      - "9000"
    ports:
      - "8088:80"

  fpm:
    build:
      context: .
      dockerfile: Dockerfile-PHP
    volumes_from: [data]
    environment:
      PHP_IDE_CONFIG: "serverName=docker"
      PHP_XDEBUG_ENABLED: 1 # Set 1 to enable.
      XDEBUG_CONFIG: remote_host=10.254.254.254
Note that now I’m exposing “9000”, this is because I’m using a different IP address to bind this port. Also I’ve added two new environment vars, one to enable xdebug and other to set the remote host address.
Configuring you IDE
As I mention above, I’m going to use PHPStorm to show you how to setup a Debug client. For practical purpose it will be separated in two sections, the first one based on Linux approach, and other for Mac.
But first let me start with common steps for all platforms:
you will need to go to Settings ( linux shortcut: ctrl+alt+s; Mac shortcut: Cmd+, ) and check in Language & Frameworks / PHP / Debug looks like the image

After that go to DBGp Proxy and follow the steps for each platform

Linux example
Since you are using localhost (127.0.0.1) and xdebug has PHPSTORM as ide_key those two values can be empty here:

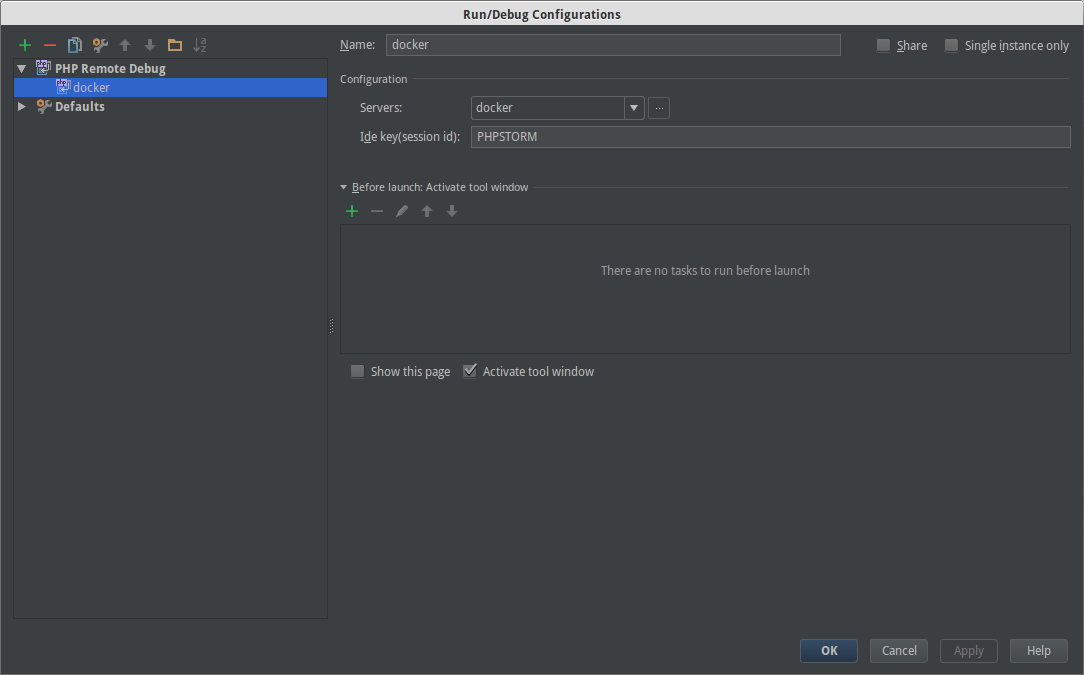
now you have to go to Debug configuration:

with the green plus sign, add a new PHP Remote Debug, change Name to docker, fill Ide Key field, and click on periods to add a new server

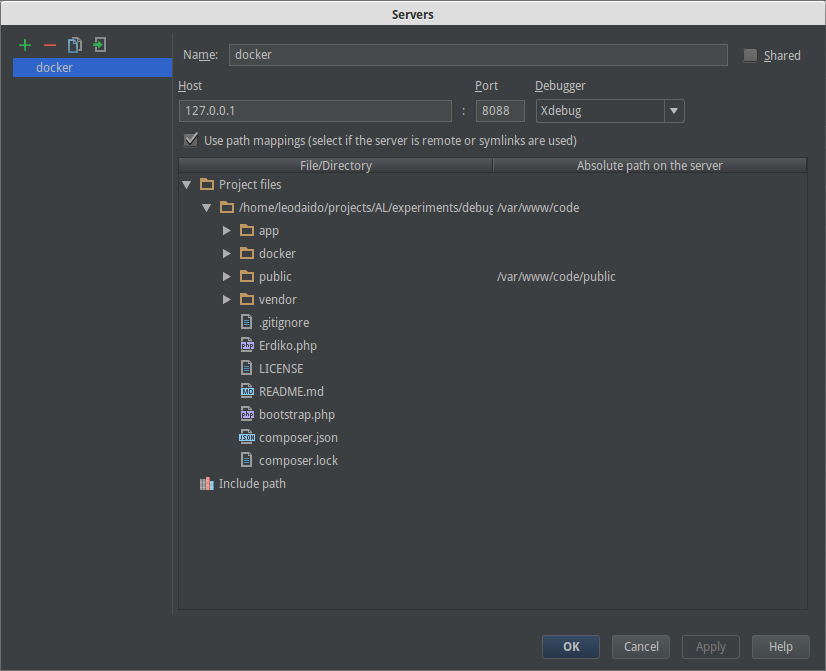
after you click on periods this new window will be opened. Again, click on green plus sign to add a new server that will be named docker, fill all field as it’s being shown, including Use path mappings check, this is a very important step, you need to let IDE know how to related docker path with local path.

Mac example
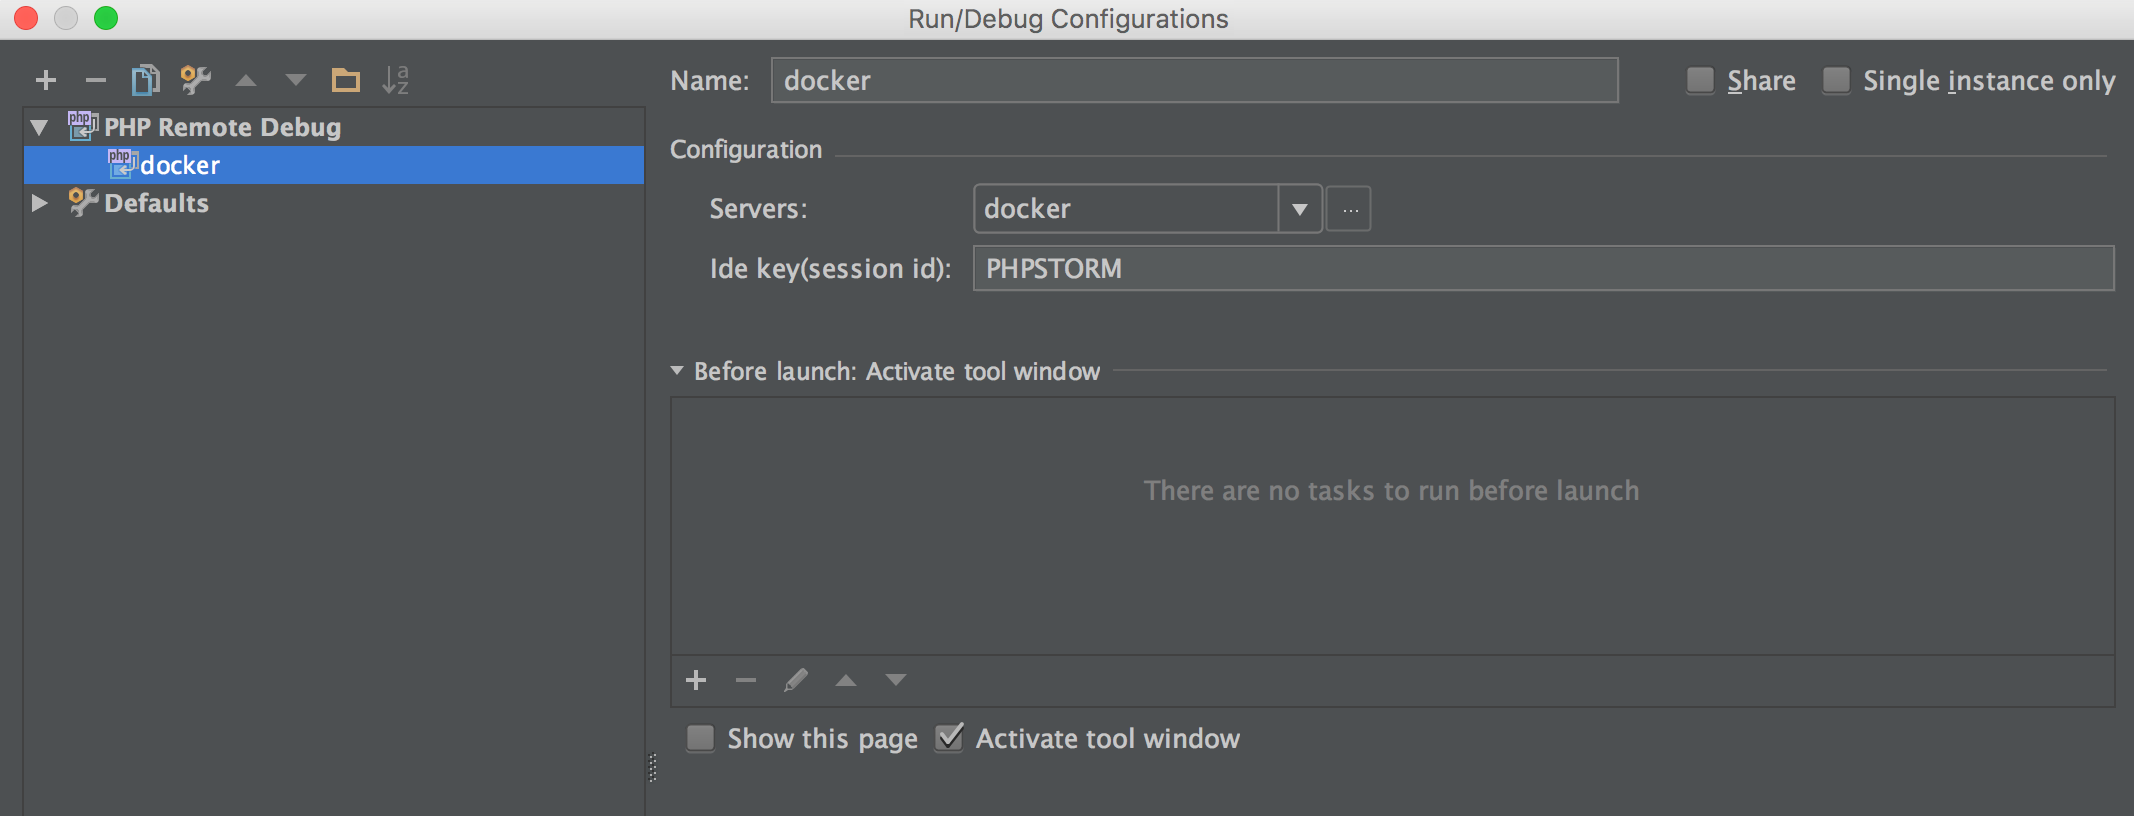
Assuming here you are using the tweak settings with IP alias, the steps are the same as linux, just need to change values for the one in screenshots:


Note this time Host field is not 127.0.0.1 but the new alias IP.

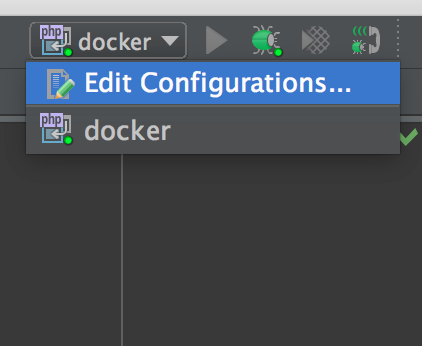
Finally, to start debugging just click on the phone icon and green bug icon

add some breakpoints and happy debug!
Thanks for reading, I hope you have enjoyed this article and don’t miss our next entry where I will bring you a tutorial about PHPdbg, and how to use it with Docker.
